Advertisement

Making Hollow Chocolate Shapes
Appears in
By Anne Willan
Published 1989
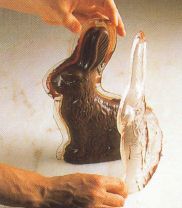
If using couverture chocolate, a cold room (not more than 60°F/16°C) is essential. All utensils must be clean, dry and at room temperature. Here, a rabbit mold is shown.
- Carefully clean a hollow chocolate mold with a soft, dry cloth. With another cloth, polish the interior with melted cocoa butter.
- Holding the mold by its edge, brush a ¼-⅜ in/6-10 mm layer of melted, tempered chocolate into the mold. Repeat with the second half of the mold. Wipe the rims of the molds clean in order to prevent the two halves of the mold sticking when they are put together.
- Clip the two halves together and allow the chocolate to harden, 5-10 minutes.
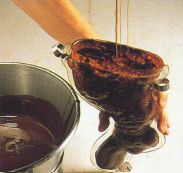
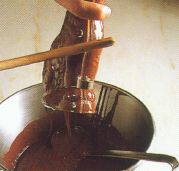
- Completely fill the mold with chocolate. Tap the edge with a spatula to eliminate air bubbles.
- Turn the mold upside down over the bowl of chocolate so that the excess chocolate pours out into the bowl. Tap the mold lightly with a spatula or wooden spoon so the layer of chocolate is even and to eliminate air bubbles. Leave the mold upright on a rack to set.
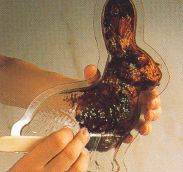
- Let the mold set completely in a cool, airy place, at 55-60°F/12-16°C. Cooling can take from 30 minutes to several hours, depending on the thickness of the chocolate layer and the humidity of the room. When the chocolate pulls away from the bottom of the mold slightly, it is set. Press the chocolate lightly with your finger to make sure. Carefully pull the two halves of the mold away from the chocolate.
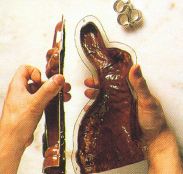
- Dip a small, sharp knife in hot water and run it along the surface of the chocolate at the seam where the two halves are joined. The chocolate will melt slightly on contact with the hot knife, leaving a smooth finish.