Advertisement

Rolling Gluten-Free Doughs & Forming Tart Crusts
Appears in
Published 2014
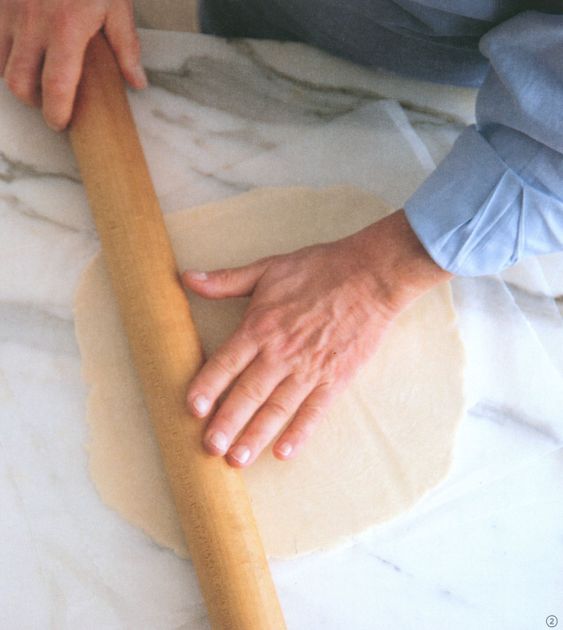
Unlike most pastries, you can’t dust the surface of gluten-free doughs with any sort of flour for rolling - the sticky nature of these doughs only makes them absorb more and more of it as you roll. Because of this, they have to be rolled between pieces of parchment or wax paper and chilled before being transferred to the baking tin.
- Have 2 large squares of parchment paper and a thin baking tray or flexible cutting board ready before beginning to roll.
- Place one of the squares of paper on your work surface and centre the chilled dough on it. Cover it with the second piece of paper
. - Press gently with your rolling pin in successive strikes that are parallel to each other and to the edge of the work surface. Turn the whole package of dough and paper 30 degrees and repeat.
- After the dough has softened slightly, roll it as for any other dough
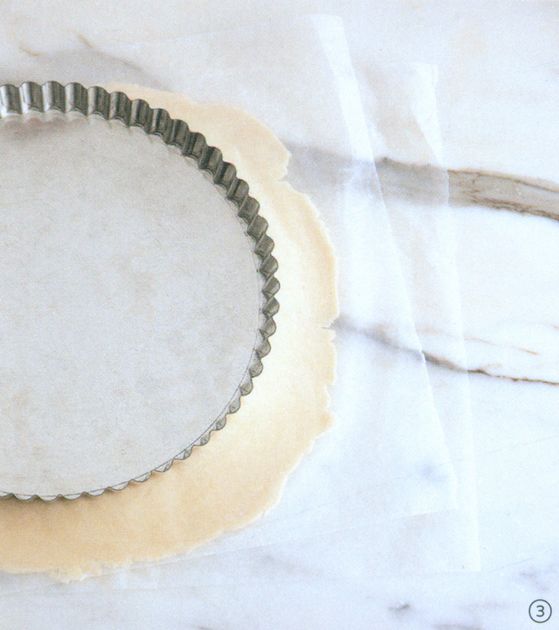
, from 6 o’clock to 12 o’clock and back again without rolling over the edges and rotating the dough 30 degrees after every set of rolls. - Once the dough is large enough for your tin
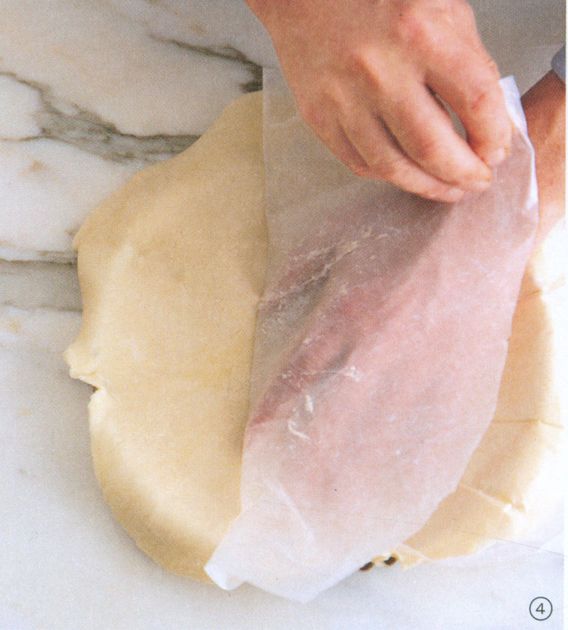
, slide the package of dough and papers onto your baking tray and chill for 15-20 minutes until it is firm. - Once the dough has chilled, spray your tart tin with vegetable cooking spray. Carefully peel off the top paper and quickly invert the dough
, centring it over the tin. - Peel away the second paper and gently ease the dough into the bottom and against the sides of the tin all around
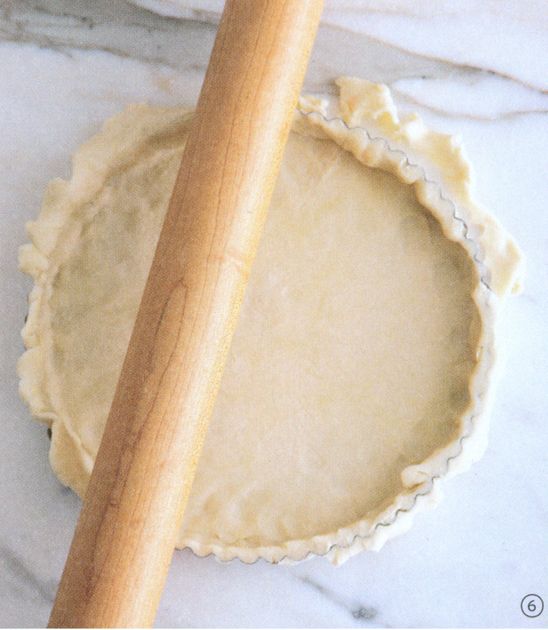
, allowing any extra to hang over the top edge. - Roll over the top of the tin with your rolling pin to remove any excess dough
. Finish off the top edge of the crust by pressing against the side of the dough with your thumb and down from the top at the same time. - For individual tart crusts, roll the dough to a square, then use scissors to cut it into squares large enough to cover the bottom and sides of your tins. Follow steps 6-8 with the individual squares of dough.